IMP:
We will have our env as below:

Section
2: Upgrading an Oracle E-Business Suite Release 12 Database to Oracle Database
19c
2.1 Before the Database Installation
1. Run hcheck.sql
hcheck.sql
- Script to Check for Known Problems in Oracle8i, Oracle9i, Oracle10g, Oracle
11g and Oracle 12c and Above (Doc ID 136697.1)
hcheck.sql:
To provide a single package which looks for common Data
Dictionary problems.
The script checks consistency of selected dictionary
relationships and looks for certain known issues - some reported
"problems" will be normal and expected.
Eg:
For 12c with Multitenant, connect to each PDB to run the
script. Example:
SQL*Plus: Release 12.1.0.2.0 Production on Tue Apr 19
08:14:13 2016
Copyright (c) 1982, 2014, Oracle. All rights reserved.
Enter username: / as sysdba
Connected to:
Oracle Database 12c Enterprise Edition Release 12.1.0.2.0 -
64bit Production
With the Partitioning, OLAP, Advanced Analytics and Real
Application Testing options
SQL> show pdbs
CON_ID CON_NAME OPEN MODE RESTRICTED
-------- ------------ -------------- -------------
2 PDB$SEED READ ONLY NO
3
CDB1_PDB1 READ WRITE NO
4
CDB1_PDB2 READ WRITE NO
SQL> alter session set container=CDB1_PDB1;
Session altered.
SQL> spool hcheck.log
SQL> @hcheck
SQL> spool off
The script will report various dictionary related issues
which may or may not be a problem. Any
problems reported should be reviewed by an experienced Oracle Support analyst
as some reported "problems" may be normal and expected.
HCKE errors are considered as a potential problem.
HCKW errors are considered as a warning.
The hcheck.sql script for Oracle 9i onwards has these status
results:
CRITICAL: Is of highest risk and requires urgent fix.
FAIL:
Requires resolution on priority.
WARN: Good to
resolve.
PASS: No problem.
Note:
One critical check the script performs is to see if there is no SYSTEM datafile that has a relative file number with the value of 1. If you encounter this error, do not proceed with any further steps in this document. You will need to perform an export/import. To do this, follow the steps documented in My Oracle Support Knowledge Document 2554156.1, Export/Import Process for Oracle E-Business Suite Release 12.2 Database Instances Using Oracle Database 19c.
2. Verify software versions
The following software component versions must exist in your
environment.

3. Allow case sensitive passwords (Optional)
Make sure SEC_CASE_SENSITIVE_LOGON parameter is set to FALSE
SQL> show parameter SEC_CASE_SENSITIVE_LOGON
The output should be FALSE.
4. Create the initialization parameter setup files
Run the following commands to create the
$ORACLE_HOME/dbs/<ORACLE_SID>_initparam.sql and
$ORACLE_HOME/dbs/<ORACLE_SID>_datatop.txt files.
$ cd $ORACLE_HOME/appsutil
$ . ./txkSetCfgCDB.env dboraclehome=<full path of
ORACLE_HOME>
$ export ORACLE_SID=<ORACLE_SID>
$ cd $ORACLE_HOME/appsutil/bin
$ perl txkOnPremPrePDBCreationTasks.pl
-dboraclehome=<ORACLE_HOME> \
-outdir=<ORACLE_HOME>/appsutil/log
-appsuser=<apps user> \
-dbsid=<ORACLE_SID> -skipdbshutdown=yes
Eg:
$ cd $ORACLE_HOME/appsutil
$ . ./txkSetCfgCDB.env
dboraclehome=/u02/product/12.1.0.2/db
$ export ORACLE_SID=TEST
$ cd $ORACLE_HOME/appsutil/bin
$ perl txkOnPremPrePDBCreationTasks.pl
-dboraclehome=/u02/product/12.1.0.2/db \
-outdir=/u02/product/12.1.0.2/db/appsutil/log
-appsuser=apps \
-dbsid=test -skipdbshutdown=yes
2.2 Database Installation
1. Prepare to create the 19c Oracle home
Note:
The 19c Oracle home must be installed on the database server
node in a different directory from the current Oracle home.
$ unzip software.zip
$ . ./runInstaller
Log in to the database server node as the owner of the
Oracle RDBMS file system and database instance. Ensure that environment
settings, such as ORACLE_HOME, are set for the new Oracle home you are about to
create, and not for any existing Oracle homes on the database server node.
Perform the below steps:
$ mkdir -p
/u01/app/oracle
$ mkdir -p
/u01/app/oraInventory
$ chown -R
oracle:oinstall /u01/app/oracle
$ chown -R
oracle:oinstall /u01/app/oraInventory
$ chmod -R 775
/u01/app
$ mkdir -p
/u01/app/oracle/product/19.0.0/dbhome_1
$ cd
/u01/app/oracle/product/19.0.0/dbhome_1
$ unzip -q
LINUX.X64_193000_db_home.zip
2. Install Oracle Database 19c
$ . ./runInstaller
Note:
In the Database installation windows, select the option to
install the database software only (do not select the option to create and
configure a single instance database). In addition to American English, select
any languages used by your Oracle E-Business Suite database instance. Choose
the Enterprise Edition installation type.
Select "Set Up Software Only" and click Next

Select "Single Instance database installation" and
click Next:

Select "Enterprise Edition" and click Next:

Verify the base directory which is selected if its not the
same directory that you have created then change the text highlighted in yellow
and click next.

Check the directory highlighted in yellow and click Next.

Click Next.

Click Next.

Make sure all prerequisite check succeeded and then click Next.

Verify all the fields and click on Install.

Login as root user and run the below scripts as prompted.

Once the scripts are executed click Close.

After the installation, make sure that:
The ORACLE_BASE environment variable is set accordingly.
The ORACLE_HOME environment variable points to the new 19c
Oracle home.
The PATH environment variable includes $ORACLE_HOME/bin and
the directory where the new perl executable is located (usually
$ORACLE_HOME/perl/bin).
The LD_LIBRARY_PATH environment variable includes
$ORACLE_HOME/lib.
The PERL5LIB environment variable points to the directories
where the new perl libraries are located: $ORACLE_HOME/perl/lib/<perl
version> and $ORACLE_HOME/perl/lib/site_perl/<perl version> for
UNIX/Linux
Make an env file with below env parameters for ORACLE_HOME
19C (ORA_HOME_19c.env).
export
ORACLE_HOME=/u01/app/oracle/product/19.0.0/dbhome_1
export ORACLE_SID=TESTCDB
export PATH=$PATH:$ORACLE_HOME/bin:$ORACLE_HOME/OPatch:$ORACLE_HOME/perl/bin
export ORACLE_BASE=/u01/app/oracle
export LD_LIBRARY_PATH=$LD_LIBRARY_PATH:$ORACLE_HOME/lib
export
PERL5LIB=$ORACLE_HOME/perl/lib/5.28.1:$ORACLE_HOME/perl/lib/site_perl/5.28.1
3. Apply additional 19c RDBMS patches
Oracle
E-Business Suite Release 12.2: Consolidated List of Patches and Technology Bug
Fixes (Doc ID 1594274.1)
Apply the latest Release Update certified for your platform
documented in Table 1.6.1
|
Patch |
Footnote |
|
32545013 |
This is the
Database Release Update Patch 19.11.0.0.210420 (Apr2021). Refer to the patch
readme for content and installation instructions. For additional information
on Oracle Database patch delivery refer to My Oracle Support Knowledge
Document 2337415.1, Oracle Database - Overview of Database Patch Delivery
Methods. |
|
32399816 |
This is the OJVM
Release Update Patch 19.11.0.0.210420 (Apr2021), which requires additional
post-patch installation steps as detailed in its readme. In particular, you
must follow the requirement for the database to be in startup upgrade mode
when applying the patch. It is advisable not to include any other patches at
the same time that require the database to have been started in normal mode. |
|
31424070 |
NA |
Do not perform any of the post install instructions, as
these will be performed after the upgrade.
4. Create the nls/data/9idata directory
On the database server node, as the owner of the Oracle
RDBMS file system and database instance, run the following command:
$ perl $ORACLE_HOME/nls/data/old/cr9idata.pl
After creating the directory, make sure that the ORA_NLS10
environment variable is set to the full path of the 9idata directory whenever
you enable the 19c Oracle home.
$ echo $ORA_NLS10
$ export ORA_NLS10=$ORACLE_HOME/nls/data/9idata
$ echo $ORA_NLS10
5. Create appsutil.zip and copy it to the database
tier
On the Application Tier of the RUN file system (as the
applmgr user) execute admkappsutil.pl script to create appsutil.zip
$ perl $AD_TOP/bin/admkappsutil.pl
This script will create appsutil.zip in $INST_TOP/admin/out
directory.
Copy the appsutil.zip to DB server
Uncompress appsutil.zip under the ORACLE_HOME (19C)
$ cd $ORACLE_HOME
$ unzip -o appsutil.zip
Note:
Appsutil directory created above will need JRE or else AD
commands will fail.
6. Install JRE 8
To install JRE 8 on the appsutil directory, copy the
$ORACLE_HOME/jdk/jre directory to $ORACLE_HOME/appsutil/jre. Run the following
commands:
$ cd $ORACLE_HOME/appsutil
$ cp -r $ORACLE_HOME/jdk/jre .
$ cp $ORACLE_HOME/jlib/orai18n.jar $ORACLE_HOME/appsutil/jre/lib/ext
7. Create the CDB
- Run
the Database Configuration Assistant (DBCA) to create the container
database (CDB).
- When
prompted, click on the "Create Database", "Advanced
Configuration", and "General Purpose or Transaction
Processing" options.
- In
the Specify Database Identification screen, check to create an empty
container database (CDB) without a PDB.
- Set
the Global Database Name, the SID to the new CDB SID (maximum of 8
characters), and check the "Use Local Undo tablespace for PDBs"
checkbox. The CDB SID has to be different from the current ORACLE_SID,
which will be the PDB SID.
- In
the "Network Configuration" section, do not create a listener.
In the "Specify Configuration Options" section, set the SGA and
PGA sizes to 2G and 1G respectively.
- Click
on the Character Sets tab and choose the Character Set and National
Character Set to be the same as in the source database. If the appropriate
Character Set does not show up, uncheck the "Show recommended
character sets only" box.
- In
the "Select Database Creation Option" section, click on the
"Customize Storage Locations" button. Set the size of the redo
log files to be the same as in the source database. Other options can be
configured as appropriate.
$ cd $ORACLE_HOME/bin
$ . ./dbca


8.
Run datapatch on the CDB
Use the following commands to load any necessary patches on the
CDB.
$ export ORACLE_SID=TESTCDB
$ cd $ORACLE_HOME/OPatch/
$ . ./datapatch
datapatch log as below:

9.
Create the CDB MGDSYS schema
Use SQL*Plus to connect to the CDB as SYSDBA and run the
$ORACLE_HOME/rdbms/admin/catmgd.sql script. This creates the new MGDSYS schema
on the CDB.
$ sqlplus "/ as sysdba"
SQL> show user
SQL> COLUMN name FORMAT A30
SQL> SELECT name, pdb FROM
v$services ORDER BY name;
SQL> @?/rdbms/admin/catmgd.sql
This creates the new MGDSYS schema on the CDB.
10. Create the CDB TNS files
On the database server node, run the following perl script
to generate the required TNS files. Note that this script does not create a
listener.
$ cd $ORACLE_HOME/appsutil
$ . ./txkSetCfgCDB.env dboraclehome=<full path of
ORACLE_HOME>
$ cd $ORACLE_HOME/appsutil/bin
$ perl txkGenCDBTnsAdmin.pl
-dboraclehome=<ORACLE_HOME> \
-cdbname=<CDB SID> -cdbsid=<CDB SID>
-dbport=<Database port> \
-outdir=<ORACLE_HOME>/appsutil/log
Eg:
$ . ./txkSetCfgCDB.env dboraclehome=/u01/app/oracle/product/19.0.0/dbhome_1
$ cd $ORACLE_HOME/appsutil/bin
$ perl txkGenCDBTnsAdmin.pl -dboraclehome=/u01/app/oracle/product/19.0.0/dbhome_1
\
-cdbname=test -cdbsid=testdb -dbport=1521 \
-outdir=/u01/app/oracle/product/19.0.0/dbhome_1/appsutil/log
11. Configure Transparent Data Encryption for CDB
(Conditional)
If you have Transparent Data Encryption (TDE) enabled in the
source database or if you choose to use TDE, perform the following steps to
create a software keystore for the CDB and to set the TDE master encryption
key:
a. Set the keystore location and type
Create the <WALLET_ROOT>/tde directory which is where
the keystore will be stored. Next, modify the following CDB initialization
parameters and then restart the database to set the parameters:
WALLET_ROOT='<WALLET_ROOT directory given above
(without "tde")>'
TDE_CONFIGURATION="KEYSTORE_CONFIGURATION=FILE"
b. Create a software keystore
Use SQL*Plus to connect to the database as a user who has
the ADMINISTER KEY MANAGEMENT or SYSKM privilege. Perform the following steps
to create the software keystore under <WALLET_ROOT>/tde.
$ export ORACLE_SID=<CDB_SID>
$ sqlplus sec_admin as syskm
SQL> administer key management create keystore
identified by "<keystore password>";
SQL> administer key management create local auto_login
keystore from keystore
'<WALLET_ROOT>/tde' identified by
"<keystore password>";
c. Open the keystore and set the TDE Master Encryption Key
Perform the following steps to open the keystore and set the
TDE Master Encryption Key in the software keystore.
SQL> administer key management set keystore open force
keystore identified by "<keystore password>";
SQL> administer key management set key force keystore
identified by "<keystore password>" with backup;
12. Shut down the CDB
$ sqlplus "/ as sysdba"
SQL> show user
SQL> COLUMN name FORMAT A30
SQL> SELECT name, pdb FROM
v$services ORDER BY name;
SQL> shutdown
2.3 Database Upgrade
1. Complete patching cycle and remove adop created
editions
As the owner of the source administration server, run any of
the following commands not previously run. This will clean up the editions
created by previous adop patching cycles. These commands also complete any open
patching cycle.
On the current run file system:
$ adop phase=prepare
$ adop phase=actualize_all
$ adop phase=finalize finalize_mode=full
$ adop phase=cutover
On the new run file system:
$ adop phase=cleanup cleanup_mode=full
2. Store the UTL_FILE_DIR parameter values
Using
UTL_FILE_DIR or Database Directories for PL/SQL File I/O in Oracle E-Business
Suite Releases 12.1 and 12.2 (Doc ID 2525754.1)
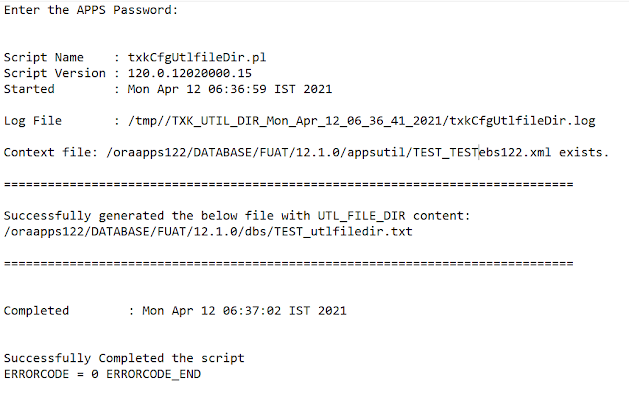
You should run the txkCfgUtlfileDir.pl script
twice in different modes to complete this task. First you run the script in getUtlFileDir
mode to retrieve the directory paths formerly specified in the UTL_FILE_DIR
database initialization parameter and prepare them for the upgrade. Then you
run the script in setUtlFileDir mode to store the directory paths
in the new Oracle E-Business Suite tables underlying the apps.v$parameter and
apps.v$parameter2 views and to create the corresponding directory objects.
To retrieve the directory path values from the source
UTL_FILE_DIR database initialization parameter:
1. Source the Oracle E-Business Suite database environment
of your 11g or 12c Oracle home.
$ $ORACLE_HOME/<sid>_<hostname>.env
2. Run the txkCfgUtlfileDir.pl script in
getUtlFileDir mode using the following command:
$ perl $ORACLE_HOME/appsutil/bin/txkCfgUtlfileDir.pl
-contextfile=<DB Context File> \
-oraclehome=<11g/12c ORACLE_HOME>
-outdir=<Output/Log location> \
-upgradedhome=<19c ORACLE_HOME> -mode=getUtlFileDir
-servicetype=onpremise|opc
With this command, the script retrieves the directory paths
stored in the UTL_FILE_DIR database initialization parameter, modifies them to
prepare them for use in Oracle Database 19c, and creates a text file named
<DB_NAME>_utlfiledir.txt in the <ORACLE_HOME>/dbs directory with
the list of modified directory paths. The -servicetype parameter defaults to
-servicetype=onpremise, but when running on Oracle Cloud, you must specify
-servicetype=opc for this parameter. The script performs the following
modifications in the directory paths:
è For on-premises instances, any occurrences of
the path /usr/tmp for UNIX/Linux, or C:\temp for Windows, are replaced with
<19c ORACLE_BASE>/temp/<PDB_NAME>, where <PDB_NAME> is the
pluggable database (PDB) name.
è
For Oracle Cloud instances, any occurrences of
the path /usr/tmp are replaced with <19c
ORACLE_HOME>/temp/<PDB_NAME>, where <PDB_NAME> is the pluggable
database (PDB) name.
è
For both on-premises and Oracle Cloud instances,
any occurrences of the 11g or 12c Oracle home within a directory path are
replaced with the 19c Oracle home. For example, the following directory path:
<11g/12c ORACLE_HOME>/appsutil/outbound/<context_name>
is changed to the following new directory path:
<19c ORACLE_HOME/appsutil/outbound/<context
name>
The script also stores the original values from the 11g or
12c UTL_FILE_DIR database initialization parameter as well as the 19c
replacement values in a text file in the log directory. You can compare the log
file with the <DB_NAME>_utlfiledir.txt file in the
<ORACLE_HOME>/dbs directory to review the modifications made by the
script.
To store the directory path values in the database:
1. Create the following directory paths:
<19c Oracle Base>/temp/<PDB NAME> - for
on-premises instances
<19c Oracle Home>/temp/<PDB NAME> - for
instances on Oracle Cloud
<19c ORACLE_HOME>/appsutil/outbound/<context name>
- for both on-premises and Oracle Cloud instances
2. Source the Oracle E-Business Suite database environment
of your 11g or 12c Oracle home.
$ . $ORACLE_HOME/<sid>_<hostname>.env
3. Run the txkCfgUtlfileDir.pl script in setUtlFileDir
mode using the following command:
$ perl $ORACLE_HOME/appsutil/bin/txkCfgUtlfileDir.pl
-contextfile=<DB Context File> \
-oraclehome=<11g/12c ORACLE_HOME>
-outdir=<Output/Log location> \
-upgradedhome=<19c ORACLE_HOME> -mode=setUtlFileDir
-servicetype=onpremise|opc [ -skipdirvalidation=Yes ]
With this command, the script reads the <ORACLE_HOME>/dbs/<DB_NAME>_utlfiledir.txt
file that you created previously and validates the physical directory paths
listed in that file. If you are creating your Oracle Database 19c instance on a
different server and cannot validate the 19c Oracle home directory, then you
should pass the -skipdirvalidation=Yes parameter in the txkCfgUtlfileDir.pl
script command. The -servicetype parameter defaults to -servicetype=onpremise,
but when running on Oracle Cloud, you must specify -servicetype=opc for
this parameter.
After validating the directory paths, the script stores the
paths for the supplemental UTL_FILE_DIR parameter in the new Oracle E-Business
Suite tables underlying the apps.v$parameter and apps.v$parameter2 views.
The txkCfgUtlfileDir.pl script also creates a directory object for each physical directory path. Note that the script creates only one directory object for each directory path; it does not create duplicate directory objects, even if a directory path appears more than once in the <DB_NAME>_utlfiledir.txt file. The first directory object that is generated is named EBS_DB_DIR_UTIL. The script uses the following naming convention for all subsequent directory objects: EBS_UTL_FILE_DIR_<random_number>
Note:
If you encounter the following warning message:
WARNING: Incorrect value s_applptmp detected on Apps Tier
nodes. Please check log for details.
UTL Script Output:
3. Shut down the application tier server processes
On each application tier server node, shut down all server processes
or services. The applications will be unavailable to users until all remaining
tasks in this section are completed.
4. Drop SYS.ENABLED$INDEXES (Conditional)
If the SYS.ENABLED$INDEXES table exists, connect to the
database as SYSDBA and run the following command to drop the table:
$ sqlplus "/ as sysdba"
SQL> desc sys.enabled$indexes;
SQL> drop table sys.enabled$indexes;
5. Remove the MGDSYS schema (Conditional)
If you are upgrading from a database version prior to Oracle
12c, log on to the old database server node, use SQL*Plus to connect to the
database as SYSDBA, and run the $ORACLE_HOME/md/admin/catnomgdidcode.sql
script. This drops the MGDSYS schema.
$ sqlplus "/ as sysdba"
SQL> show user
SQL> SELECT name,open_mode FROM
v$database;
SQL> @?/md/admin/catnomgdidcode.sql
6. Shut down the database listener
On the database tier server node, shut down the Oracle Net
or Net8 database listener in the old Oracle home.
Note:
To ensure that the database does not inadvertently point to
a non-existent listener during the upgrade, verify that you do not have the
LOCAL_LISTENER initialization parameter set.
$ sqlplus "/ as sysdba"
SQL> SELECT name,open_mode FROM
v$database;
SQL> alter system set local_listener='';
7. Prepare to upgrade
Note:
If you are using Transparent Data Encryption (TDE), perform
the steps listed in the "Copying Transparent Encryption Oracle
Wallets" subsection of the "Database Preparation Tasks to Complete
Before Starting Oracle Database Upgrades" section of Chapter 2. This
wallet copy is the non-CDB wallet, which is different from the CDB wallet
created previously.
Ensure that the oratab file contains an entry for the
database to be upgraded.
Modify the following initialization parameters before the
upgrade:
è Comment out all the deprecated initialization
parameters. Any necessary parameter will be added back in after the upgrade.
è
Unset the olap_page_pool_size initialization
parameter.
è
If you have an 11g source database, set the
PGA_AGGREGATE_TARGET initialization parameter to at least 10G.
è
Set the SGA_TARGET initialization parameter to
at least 2G.
è
Add the event EVENT='10946 trace name context
forever, level 8454144'
Shut down and restart the database to enable the parameters.
Note:
The preupgrade.jar log file provides instructions to remove
the OLAP catalog (amd_exists). It does not actually remove the OLAP catalog.
Run the $ORACLE_HOME/olap/admin/catnoamd.sql script manually to remove
the OLAP catalog.
$ sqlplus / as sysdba
SQL> @$ORACLE_HOME/olap/admin/catnoamd.sql
Database Pre-Upgrade Steps
With 12C env sourced perform below steps:
$ cd $ORACLE_HOME/rdbms/admin
$ $ORACLE_HOME/jdk/bin/java -jar ./preupgrade.jar FILE TEXT
This will generate two scripts in cfgtoollogs, one for preupgrade_fixups
and other for postupgrade_fixups.

Run the preupgrade_fixups script and do the relevant
changes.
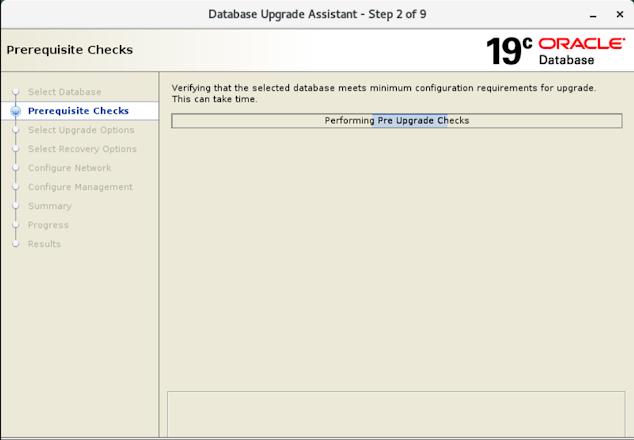
8. Upgrade the database instance
The instructions for the database upgrade are outlined in
Appendix B and Chapter 6 of the Oracle Database Upgrade Guide 19c. Perform the
steps in Appendix B and and any step in chapter 6 that is relevant to your
environment.
Invoke DBUA using the following command. The keepEvents
parameter allows events in the preupgraded database to be enabled during the
upgrade.
$ dbua -keepEvents
In Oracle Database 19c, the DMSYS schema is no longer used.
The Data Mining option is installed in the SYS schema. The Oracle 19c
pre-upgrade tool has been extended to include a warning that the DMSYS schema
should be dropped. If this warning is reported, it is recommended to drop the
schema. Removing the DMSYS schema has no effect on the functioning of Data
Mining.
Disregard warnings related to Network ACLs. AutoConfig
manages all the Oracle E-Business Suite Network ACLs.
When upgrading all statistics tables, note that Oracle
E-Business Suite has only one statistics table (APPLSYS.FND_STATTAB) that needs
to be upgraded.
Take note of the following after the upgrade:
The OLAP Catalog Component (AMD) may have "OPTION
OFF" or "REMOVED" status in the dba_registry table. Oracle
E-Business Suite has no dependencies on AMD and so this is acceptable.
Ensure that the trigger SYSTEM.EBS_LOGON is valid by
connecting to the database using SQL*Plus as SYSDBA and running the following
compile command:
SQL> alter trigger SYSTEM.EBS_LOGON compile;
Modify the following initialization parameters after the
upgrade:
è
If you previously had the
SEC_CASE_SENSITIVE_LOGON initialization parameter set to FALSE, re-enable the
parameter.
è
Set COMPATIBLE to 19.0.0.
è
If you modified the PGA_AGGREGATE_TARGET
initialization parameter in the previous step, revert it back to the original
value.
Note:
Since we will be upgrading the database using DBUA we will
have to check the doc
Oracle
19c - Complete Checklist for upgrading Oracle 12c, 18c Container Database (CDB)
to Oracle 19c Release using DBUA (Doc ID 2543981.1)
Invoke DBUA using the following command. The keep events
parameter allows events in the preupgraded database to be enabled during the
upgrade.
Make sure 12c db entry is present in /etc/oratab
$ $ORACLE_HOME/bin/dbua -keepEvents


SQL> select banner from v$version;
Run the Post Upgrade Script generated during the Pre-Upgrade
Steps.
Sorce 19c Environment
$ export ORACLE_SID=<source SID>
SQL> alter system set SEC_CASE_SENSITIVE_LOGON=true;
SQL> alter trigger SYSTEM.EBS_LOGON compile;
SQL> alter system set compatible='19.0.0'
scope=spfile;
Restart DB
SQL> show parameter compatible
NAME TYPE VALUE
-------- ------ ------
compatible string 19.0.0
$ $ORACLE_HOME/OPatch/datapatch
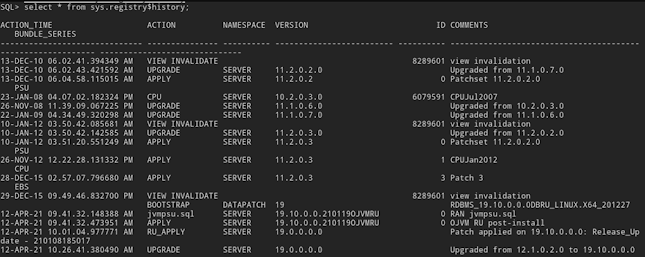
$ sqlplus / as sysdba
SQL> select * from sys.registry$history;
9. Perform patch post-install instructions
Run all the patch post install instructions.
Note:
Several patches may require datapatch to be run. This only
needs to be run once after the last patch has been applied.
Connect to the database as SYSDBA and run the following
scripts:
SQL> @?/rdbms/admin/dbmsxdbschmig.sql
SQL> @?/rdbms/admin/prvtxdbschmig.plb
2.4 After the Database Upgrade
1. Run adgrants.sql
Copy $APPL_TOP/admin/adgrants.sql (adgrants_nt.sql for
Windows) from the administration server node to the database server node. Use
SQL*Plus to connect to the database as SYSDBA, and run the script using the
following command:
$ export ORACLE_SID=TEST
$ sqlplus "/ as sysdba" @adgrants.sql
Note:
When running adgrants.sql, you may get ORA-00942 errors.
These are caused by adgrants.sql trying to create grants on non-existent
objects. The errors can be ignored.
2. Grant create procedure privilege on CTXSYS
Copy $AD_TOP/patch/115/sql/adctxprv.sql from the administration
server node to the database server node. Use SQL*Plus to connect to the
database as apps and run the script using the following command:
$ export ORACLE_SID=<source SID>
$ sqlplus apps/<apps password> @adctxprv.sql
<SYSTEM password> CTXSYS
3. Compile invalid objects
Use SQL*Plus to connect to the database as SYSDBA and run
the $ORACLE_HOME/rdbms/admin/utlrp.sql script to compile invalid objects.
$ export ORACLE_SID=<source SID>
$ sqlplus "/ as sysdba"
@$ORACLE_HOME/rdbms/admin/utlrp.sql
4. Grant datastore access
Use SQL*Plus to connect to the database as SYSDBA and run
the following command:
$ export ORACLE_SID=<source SID>
$ sqlplus "/ as sysdba"
SQL> grant text datastore access to public;
5. Gather statistics for the SYS schema
Copy $APPL_TOP/admin/adstats.sql from the administration
server node to the database server node. Note that adstats.sql has to be run in
restricted mode. Use SQL*Plus to connect to the database as SYSDBA and use the
following commands to run adstats.sql in restricted mode:
$ export ORACLE_SID=<source SID>
$ sqlplus "/ as sysdba"
SQL> alter system enable restricted session;
SQL> @adstats.sql
$ sqlplus "/ as sysdba"
SQL> alter system disable restricted session;
SQL> exit;
6. Create the new MGDSYS schema (Conditional)
If you upgraded from a database version prior to Oracle 12c,
use SQL*Plus to connect to the database as SYSDBA and run the
$ORACLE_HOME/rdbms/admin/catmgd.sql script. This creates the new MGDSYS schema.
$ export ORACLE_SID=<source SID>
$ sqlplus "/ as sysdba"
@?/rdbms/admin/catmgd.sql
7. Create Demantra privileges (Conditional)
If you are using Demantra, perform the steps in My Oracle
Support Knowledge Document 730883.1,
Installer Created Privileges PLUS Additional Database Privilege needed for
Demantra Schema when Running on Oracle 11g Database.
8. Export Master Encryption Key (Conditional)
If the database is encrypted, perform the following steps to
export the non-CDB wallet Master Encryption Key.
a. Disable Auto-Login wallet if enabled
Use SQL*Plus to connect to the database as SYSDBA and run
the following query to determine if the wallet is opened in Auto-Login mode.
SQL> select wallet_type from v$encryption_wallet;
WALLET_TYPE
--------------------
AUTOLOGIN
If the result is AUTOLOGIN, disable Auto-Login by
running the following commands:
SQL> administer key management set keystore close;
SQL> !mv <new 19c wallet location>/cwallet.sso
<new 19c wallet location>/cwallet.sso_old
SQL> !cp <new 19c wallet location>/ewallet.p12
<new 19c wallet location>/ewallet.p12_old
SQL> administer key management set keystore open
identified by <wallet password>;
SQL> administer key management set key identified by
<wallet password> with backup;
b.Export wallet keys
Run the following command to export the current wallet
SQL> administer key management export encryption keys
with secret
"<secret password>" to '<export file
name>' identified by <wallet password>;
c.Change the wallet to Auto-Login mode
Run the following command to change the wallet to Auto-Login
mode.
SQL> administer key management create auto_login
keystore from keystore
'<new 19c wallet location>' identified by
<wallet password>;
2.5 Convert Database to Multitenant Architecture
In this subsection, there are two databases that are
associated with the 19c Oracle home, the CDB and the non-CDB database.
Moreover, the non-CDB database will be migrated to the PDB database. Set the
appropriate environment variables to connect to the appropriate database.
Only the txkSetCfgCDB.env file in the
$ORACLE_HOME/appsutil directory is necessary. It sets certain environment
variables. However, it does not distinguish between the different databases in
the 19c Oracle home. It is used mainly to complete the steps in this
subsection. The following steps assume that a new window is brought up every
time. However, there is no need to run txkSetCfgCDB.env twice in the
same window. So, you may skip running the txkSetCfgCDB.env script if it
has already been run on the particular terminal you are using.
After running the txkPostPDBCreationTasks.pl,
additional environment files are created so that connecting to the database is
more convenient. Load the proper environment variables and connect to the
database by performing the following steps:
è
For the non-CDB database, source the
$ORACLE_HOME/<non-CDB SID>_<HOST>.env/cmd file. Then, run sqlplus
<user>/<password>@<non-CDB SID>. (The environment file was
created during the earlier upgrade steps)
è
For the CDB database, source the
$ORACLE_HOME/<CDB SID>_<HOST>.env/cmd file. Then, run sqlplus
<user>/<password> or connect as SYSDBA.
è
For the PDB database on UNIX/Linux platforms, to
connect as SYSDBA, source the $ORACLE_HOME/<CDB SID>_<HOST>.env
file. Set the ORACLE_PDB_SID environment variable to <PDB SID>. Then,
connect as SYSDBA.
è
For the PDB database, to connect to other users,
source the $ORACLE_HOME/<PDB SID>_<HOST>.env/cmd file. Then, run
sqlplus <user>/<password>@<PDB SID>.
1. Create the PDB descriptor
Perform the following commands to create the PDB descriptor
file in the $ORACLE_HOME/dbs directory.
$ cd $ORACLE_HOME/appsutil
$ . ./txkSetCfgCDB.env dboraclehome=<full path of
ORACLE_HOME>
$ export ORACLE_SID=<source SID>
$ cd $ORACLE_HOME/appsutil/bin
$ perl txkOnPremPrePDBCreationTasks.pl -dboraclehome=<ORACLE_HOME>
\
-outdir=<ORACLE_HOME>/appsutil/log
-appsuser=<apps user> -dbsid=<source SID>
Note:
The txkOnPremPrePDBCreationTasks.pl script shuts down the
non-CDB database. Do not manually bring up the non-CDB database. There will be
no access to the non-CDB database until after the migration of the non-CDB
database to the PDB.
Eg:
$ cd $ORACLE_HOME/appsutil
$ . ./txkSetCfgCDB.env dboraclehome=
Oracle Home being passed: /u01/app/oracle/product/19.0.0/dbhome_1
$ export ORACLE_SID=TEST
$ cd $ORACLE_HOME/appsutil/bin
$ perl txkOnPremPrePDBCreationTasks.pl
-dboraclehome=/u01/app/oracle/product/19.0.0/dbhome_1 \
> -outdir=/oraapps122/DATABASE/TEST/19c/appsutil/log
-appsuser=apps -dbsid=TEST
Enter the APPS Password:
2. Disable the ENCRYPTION_WALLET_LOCATION sqlnet.ora
entry (Conditional)
If the database is encrypted, remove or comment out the
ENCRYPTION_WALLET_LOCATION entry in both the Oracle Database 19c sqlnet.ora and
sqlnet_ifile.ora files.
3. Update the CDB initialization parameters
On the database server node, copy the <source
SID>_initparam.sql and <source SID>_datatop.txt files from
the source $ORACLE_HOME/dbs directory to the new $ORACLE_HOME/dbs
directory. Then use SQL*Plus to connect to the CDB as SYSDBA, and run the
following commands to update the CDB initialization parameters:
$ cd $ORACLE_HOME/appsutil
$ . ./txkSetCfgCDB.env dboraclehome=<full path of
ORACLE_HOME>
$ export ORACLE_SID=<CDB SID>
$ sqlplus "/ as sysdba"
SQL> startup nomount;
SQL> @$ORACLE_HOME/dbs/<source
SID>_initparam.sql
SQL> alter system set
LOCAL_LISTENER="<hostname>:<port number>" scope=both;
SQL> shutdown;
SQL> startup;
Eg:
$ cd $ORACLE_HOME/appsutil
$ . ./txkSetCfgCDB.env dboraclehome=$ORACLE_HOME
Oracle Home being passed: /u01/app/oracle/product/19.0.0/dbhome_1
$ export ORACLE_SID=funcdb
$ sqlplus "/ as sysdba"
Connected to an idle instance.
SQL> startup nomount;
ORACLE instance started.
Total System Global Area 2147482336
bytes
Fixed Size
9136864 bytes
Variable Size 570425344
bytes
Database Buffers 1560281088 bytes
Redo Buffers 7639040
bytes
SQL> @$ORACLE_HOME/dbs/TEST_initparam.sql
SQL> alter system set
LOCAL_LISTENER="testebs122:1521" scope=both;
System altered.
SQL> shutdown;
ORA-01507: database not mounted
ORACLE instance shut down.
SQL> startup
ORA-32004: obsolete or deprecated parameter(s) specified for
RDBMS instance
ORACLE instance started.
Total System Global Area 2147482136 bytes
Fixed Size 9136664 bytes
Variable Size 436207616 bytes
Database Buffers
1677721600 bytes
Redo Buffers 24416256 bytes
Database mounted.
Database opened.
If using a pfile initialization parameter file, add the
LOCAL_LISTENER setting to the file. Ignore any ORA-25138 errors that occur when
there are initialization parameters in the source database that are obsolete in
Oracle Database 19c.
Note:
During this process, setting some parameters using ALTER
SYSTEM SET may fail as they can only be set when the database is open. For
example:
ORA-07452: specified resource manager plan does not exist in
the data dictionary
For any such parameters, identify the appropriate ALTER
SYSTEM SET commands from the <source SID>_initparam.sql script and run
them manually after starting or opening the database. You will need to restart
the database again for those parameters to take effect.
4. Check for PDB violations
Use the following commands to run the
txkChkPDBCompatability.pl script. This checks the PDB for any violations.
$ cd $ORACLE_HOME/appsutil
$ . ./txkSetCfgCDB.env dboraclehome=<full path of
ORACLE_HOME>
$ export ORACLE_SID=<CDB SID>
$ cd $ORACLE_HOME/appsutil/bin
$ perl txkChkPDBCompatability.pl
-dboraclehome=<ORACLE_HOME> \
-outdir=<ORACLE_HOME>/appsutil/log -cdbsid=<CDB
SID> \
-pdbsid=<source SID> -servicetype=onpremise
Eg:
$ cd $ORACLE_HOME/appsutil
$ . ./txkSetCfgCDB.env dboraclehome=$ORACLE_HOME
Oracle Home being passed: /u01/app/oracle/product/19.0.0/dbhome_1
$ export ORACLE_SID=TEST
$ cd $ORACLE_HOME/appsutil/bin
$ perl txkChkPDBCompatability.pl
-dboraclehome=$ORACLE_HOME \
> -outdir=$ORACLE_HOME/appsutil/log -cdbsid=TESTCDB\
> -pdbsid=TEST -servicetype=onpremise
Note:
Review all warnings and resolve all errors. Do not run
noncdb_to_pdb.sql as that will be run by txkCreatePDB.pl in the next step.
Note:
Use the same command options for Oracle Cloud Infrastructure Compute environments.
5. Create the PDB
Load the environment variables by running the following
commands.
$ cd $ORACLE_HOME/appsutil
$ . ./txkSetCfgCDB.env dboraclehome=<full path of
ORACLE_HOME>
$ cd $ORACLE_HOME/appsutil/bin
If the database is encrypted, use the following command to
run the txkCreatePDB.pl script to create the PDB.
$ perl txkCreatePDB.pl -dboraclehome=<ORACLE_HOME>
-outdir=<ORACLE_HOME>/appsutil/log \
-cdbsid=<CDB SID> -pdbsid=<source SID>
-dbuniquename=<CDB SID> -istdeenabled=yes \
-secretkeyfile=<full path of non-CDB wallet keys file
created in step 2.4.8.b> \
-keystoreloc=<WALLET_ROOT specified in step
2.2.11/tde> -servicetype=onpremise
Otherwise, use the following command:
$ perl txkCreatePDB.pl -dboraclehome=<ORACLE_HOME>
-outdir=<ORACLE_HOME>/appsutil/log \
-cdbsid=<CDB SID> -pdbsid=<source SID>
-dbuniquename=<CDB SID> -servicetype=onpremise
Note:
Use the same command options for Oracle Cloud Infrastructure
Compute environments.
The PDB datafile location can be the same as the source
datafile location. When prompted with "Enter the wallet credentials"
and "Enter the secret key", enter the previously specified CDB wallet
password and non-CDB secret password respectively.
Eg:
$ cd $ORACLE_HOME/appsutil
$ . ./txkSetCfgCDB.env dboraclehome=$ORACLE_HOME
Oracle Home being passed: /u01/app/oracle/product/19.0.0/dbhome_1
$ cd $ORACLE_HOME/appsutil/bin
$ perl txkCreatePDB.pl -dboraclehome=$ORACLE_HOME
-outdir=$ORACLE_HOME/appsutil/log \
> -cdbsid=testcdb -pdbsid=TEST -dbuniquename=testcdb
-servicetype=onpremise
I am keeping the data top for non-CDB and PDB the same.
DATA_TOP_1
===========
Enter the non-CDB data top [/u02/app/oracle/data/TEST/]:
Enter the corresponding PDB data top
[/u02/app/oracle/data/TEST/]:
6. Run the post PDB script
Use the following commands to run the
txkPostPDBCreationTasks.pl script. This updates the PDB configuration.
$ cd $ORACLE_HOME/appsutil
$ . ./txkSetCfgCDB.env dboraclehome=<full path of
ORACLE_HOME>
$ perl
$ORACLE_HOME/appsutil/bin/txkPostPDBCreationTasks.pl
-dboraclehome=<ORACLE_HOME> \
-outdir=<ORACLE_HOME>/appsutil/log -cdbsid=<CDB
SID> -pdbsid=<PDB SID> \
-appsuser=apps -dbport=<TNS port number>
-servicetype=onpremise
Note:
Use the same command options for Oracle Cloud Infrastructure
Compute environments.
Eg:
$ cd $ORACLE_HOME/appsutil
$ . ./txkSetCfgCDB.env dboraclehome=$ORACLE_HOME
Oracle Home being passed: /oraapps122/DATABASE/FUAT/19c
$ perl
$ORACLE_HOME/appsutil/bin/txkPostPDBCreationTasks.pl -dboraclehome=$ORACLE_HOME
\
> -outdir=$ORACLE_HOME/appsutil/log -cdbsid=funcdb
-pdbsid=TEST \
> -appsuser=apps -dbport=1521 -servicetype=onpremise
Enter the APPS Password:
Enter the CDB SYSTEM Password:
7. Modify initialization parameters
Use the following sections in My Oracle Support Knowledge
Document 396009.1, Database Initialization Parameter Settings for Oracle
E-Business Suite Release 12, as a guideline in modifying your initialization
parameters.
è
Common Database Initialization Parameters For
All Releases
è
Release-Specific Database Initialization
Parameters For Oracle 19c
è
Additional Database Initialization Parameters
For Oracle E-Business Suite Release 12.2
è
Temporary Tablespace Setup
è
Database Initialization Parameter Sizing
8. Run AutoConfig on applications tier
As the user of the applications server node, on both the
Patch and Run APPL_TOP, modify the $TNS_ADMIN/tnsnames.ora file to specify the
CDB instance name. The following shows the format of the new TNS entry.
<TWO_TASK> =
(DESCRIPTION =
(ADDRESS =
(PROTOCOL=tcp)(HOST=<hostname>.<domain>)(PORT=<port number>))
(CONNECT_DATA =
(SERVICE_NAME=ebs_<PDB SID>)(INSTANCE_NAME=<CDB SID>))
)
Eg:
testcdb =
(DESCRIPTION =
(ADDRESS =
(PROTOCOL=tcp)(HOST=testebs122.lab)(PORT=1521))
(CONNECT_DATA =
(SERVICE_NAME=ebs_TEST)(INSTANCE_NAME=testcdb))
)
Update the following values in the context file of every
Applications tier server node.
|
Variable Name |
Value |
|
s_dbport |
New database port |
|
s_apps_jdbc_connect_descriptor |
NULL (blank entry) |
|
s_applptmp |
Directory
(not /usr/tmp) defined in UTL_FILE_DIR |
To identify the allowable directories for s_applptmp use,
connect to the Oracle E-Business Suite database instance as the apps user and
run the following query:
SQL> select value from v$parameter where
name='utl_file_dir';
Run AutoConfig on both patch and run APPL_TOPs using the
following command.
$ $INST_TOP/admin/scripts/adautocfg.sh
Note:
When running AutoConfig on the patch file system APPL_TOP,
ignore all errors.
14. Restart application tier server processes
Restart all the application tier server processes you shut down previously. Remember that the Oracle Net listener for the database instance, as well as the database instance itself, need to be started in the 19c Oracle home. Users may return to the system.
References:
Interoperability Notes: Oracle E-Business Suite Release 12.2 with Oracle Database 19c (MOS Note 2552181.1)
https://docs.oracle.com/en/database/oracle/oracle-database/19/upgrd/index.html
https://docs.oracle.com/cd/V39571_01/current/acrobat/122ebssu.pdf
https://docs.oracle.com/en/database/oracle/oracle-database/19/lacli/index.html
Oracle 19c - Complete Checklist for upgrading Oracle 12c, 18c Container Database (CDB) to Oracle 19c Release using DBUA (Doc ID 2543981.1)
Oracle 19c - Complete Checklist for Upgrading to Oracle Database 19c (19.x) using DBUA (Doc ID 2545064.1)
Oracle 19c - DBUA In Silent Mode (Doc ID 2548985.1)
Using Oracle 19c RAC Multitenant (Single PDB) with Oracle E-Business Suite Release 12.2 (Doc ID 2530665.1)
Using UTL_FILE_DIR or Database Directories for PL/SQL File I/O in Oracle E-Business Suite Releases 12.1 and 12.2 (MOS Note 2525754.1)


No comments:
Post a Comment